


Table of Contents
- Why Install Pendant Lights Without Drilling?
- What You'll Need for a No-Drill Setup
- Step-by-Step: How to Install Pendant Lights Without Drilling
- Adhesive Ceiling Hooks for Heavy Lights: What Works
- Renter-Friendly Lighting Solutions: Temporary Alternatives
- How to Hide Pendant Light Cords Without Hard Wiring
- Removal and Damage Prevention: Leaving No Trace
- Conclusion: Your Ceiling, Your Rules
- Frequently Asked Questions
Last Updated: September 9, 2026
Why Install Pendant Lights Without Drilling?
Renting a home often means living with a landlord's idea of lighting, not your own. Drilling holes for a pendant light can cost you your security deposit, and even homeowners sometimes hesitate before committing to a new ceiling fixture. Installing pendant lights without drilling solves that problem completely, letting you change your lighting layout as often as your mood changes.
This guide from Nuits walks through the entire process, from choosing the right adhesive hook to hiding the cord so the result looks intentional. You'll learn which methods genuinely hold weight, which surfaces they stick to, and how to remove everything cleanly when you move on. The techniques below work for plug-in pendants, which connect to a standard wall socket rather than your ceiling's wiring.

The core principle is simple: replace the ceiling-mounted junction box with a surface-mounted hook and route the cord to a nearby outlet. No electrical work, no patching, no deposit lost.
What You'll Need for a No-Drill Setup
Before starting, gather the materials that make a no-drill installation safe and secure. You need a plug-in pendant light, an adhesive ceiling hook rated for the fixture's weight, a cable clip kit, and a few basic tools.
Most adhesive ceiling hooks list a weight capacity between 2 and 15 kilograms, but that number assumes a clean, flat surface and proper settling time. The hook's actual holding power depends on shear strength, which measures how well the adhesive resists forces pulling straight down. Hanging a light creates exactly that downward pull, so a hook rated for 5 kilograms can safely hold a 2-kilogram pendant with room to spare.
You will also want surface preparation supplies: isopropyl alcohol wipes and a dry microfiber cloth. For cord management, pick up self-adhesive cable clips or a cord cover kit that matches your ceiling color. These cost little and make the difference between a tidy installation and a visible wire running across your room.
Step-by-Step: How to Install Pendant Lights Without Drilling
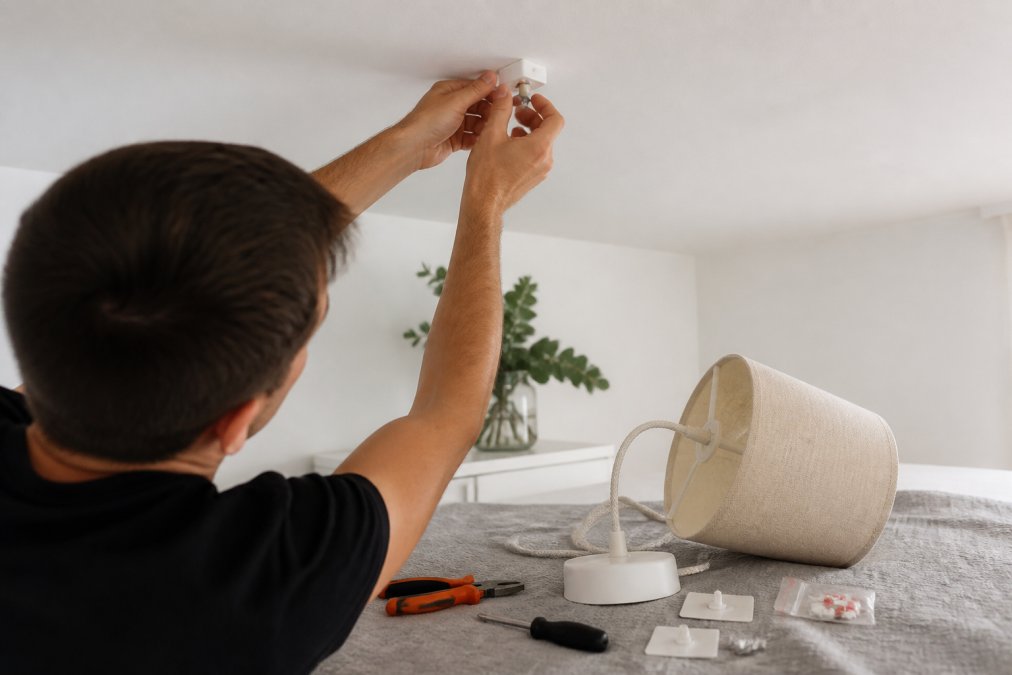
The installation process takes about 20 minutes once you have your materials ready. Follow these steps in order, and give the adhesive time to cure before hanging anything from it.
Step 1: Verify the Weight and Calculate the Safety Margin
Before buying a hook, know exactly what you're hanging. Check the pendant light's specification sheet for its weight, not the shipping weight, the fixture weight. A typical plug-in pendant with a fabric shade weighs between 1 and 3 kilograms. Add 0.5 kilograms to account for the cord, any chain, and a bulb if the fixture doesn't include one.
Now apply the safety factor: choose a hook rated for at least double that total. Here's the reasoning. Adhesive hooks are tested for shear strength, the force pulling straight down along the adhesive plane. A pendant light creates exactly that downward pull. But the rated number assumes ideal conditions: clean surface, full contact, and proper curing. Real-world conditions, slight texture, dust, humidity, reduce effective capacity by 20 to 40 percent (the CDC). Doubling the rating gives you a buffer that turns a theoretical bond into a dependable one.
For a 2-kilogram pendant, you need a hook rated for at least 4 kilograms. For a 3-kilogram fixture, look for a 6-kilogram rating. If the hook's packaging doesn't list a weight rating in kilograms, don't buy it, vague claims like "heavy duty" are not engineering specifications.
Step 2: Prepare the Ceiling Surface
Clean the exact spot where the hook will sit. Wipe the area with an isopropyl alcohol wipe to remove dust and grease, then dry it with a clean cloth. Skipping this step is the most common reason adhesive hooks fail, since ceiling texture and residue prevent full contact.
Step 3: Mount the Hook and Let It Cure
Press the hook firmly against the ceiling for 30 to 60 seconds, applying steady pressure with your palm. Then wait. The adhesive needs a full 24 hours to reach its rated bond strength. During this period, do not hang anything from the hook, not even a test weight.
Step 4: Test the Bond Before Hanging Your Fixture
After the curing period, perform a load test. Attach a weight equal to your pendant light's total weight to the hook, a bag of sugar or a water bottle works, and leave it for 2 hours. Check that the hook hasn't shifted or pulled away from the ceiling. If it holds, your installation is sound. If it fails, the test saved you from a broken fixture and a damaged ceiling.
Step 5: Hang the Light and Route the Cord
Hook the light's loop or chain onto the hook and route the cord toward your outlet. Use adhesive cable clips to secure the cord every 30 to 50 centimeters along the ceiling-to-wall junction. Let the light hang for a few hours and re-check the hook's position. A slight shift means the bond is still settling; a visible gap means the adhesive is failing and you need a different mounting method.
Adhesive Ceiling Hooks for Heavy Lights: What Works
Adhesive ceiling hooks for heavy lights fall into three categories, and only one genuinely suits pendant lighting. Standard plastic hooks work for garlands and lightweight decor up to about 1 kilogram. Metal hooks with foam tape handle 2 to 4 kilograms on smooth surfaces. For anything heavier, choose a hook with a screw-in design that uses a high-bond adhesive plate.
But the real differentiator isn't the hook's brand or price, it's the surface you're sticking it to. Most guides gloss over this, yet it's the single most common reason an installation fails. Here is how the three main ceiling types behave:
Smooth, flat painted ceilings give adhesive its best chance. The hook's plate makes full contact, and the bond strength approaches the manufacturer's rated capacity. Clean the spot with isopropyl alcohol, wait 24 hours, and you can trust the rated weight.
Textured or orange-peel ceilings reduce contact area by 30 to 50 percent. The adhesive only grips the peaks of the texture, not the valleys. A hook rated for 5 kilograms may only hold 2 to 3 kilograms in practice. If your ceiling has a spray-on texture, skip adhesive hooks entirely and use a tension rod or cable system instead.
Popcorn ceilings are the worst case. The adhesive bonds to the popcorn material itself, which is fragile and crumbles under load. Even a 1-kilogram pendant can pull the popcorn off the ceiling, leaving a permanent scar that will cost you your deposit. Never use an adhesive hook on a popcorn ceiling.
Wallpaper or vinyl-covered ceilings create a different problem: the adhesive bonds to the wallpaper, not the ceiling. When you remove the hook, the wallpaper tears. If you must hang a light in a wallpaper-ceiling room, use a tension rod between walls instead.
Before committing, run a simple adhesion test. Press a strip of high-quality painter's tape onto the exact spot, leave it for 10 minutes, then pull it off at a 45-degree angle. If paint or texture comes with it, the surface is not sound. If the tape comes away clean, proceed. This test takes less time than re-painting a ceiling.
Also check for flaking or chalky paint. Run your palm flat across the ceiling; if white dust coats your hand, the paint is failing and will pull away with any adhesive. In that case, no hook, regardless of rating, will hold safely.
Renter-Friendly Lighting Solutions: Temporary Alternatives
When adhesive hooks cannot handle the weight, renter-friendly lighting solutions shift from sticking to the ceiling to spanning it. Tension rods and cable systems offer a genuinely damage-free way to hang heavier pendants.
A tension rod wedged between two walls can support a pendant light if the rod is rated for vertical load. Position the rod directly above where you want the light, then hang the fixture from it using a cable or chain. This works well over dining tables and kitchen islands where walls sit close on either side.
Cable kits take a different approach: they anchor to a wall near the ceiling, run a taught wire across to another anchor point, and let you hang the light from the wire. These systems distribute weight horizontally, so they handle heavier fixtures than most adhesive hooks. Many kits come with decorative end caps that hide the mounting hardware.
How to Hide Pendant Light Cords Without Hard Wiring
A visible cord running across your ceiling is the telltale sign of a no-drill installation. Hiding pendant light cords without hard wiring comes down to routing them along existing lines and matching your surroundings.
Start by running the cord along the ceiling-to-wall junction, where it reads as a deliberate design choice rather than an afterthought. Secure it every 30 to 50 centimeters with small adhesive cable clips. Paint the clips and the cord to match your ceiling color, which makes both nearly invisible from floor level.
For cords that must cross open ceiling, use a cord cover kit: a slim adhesive channel that snaps shut over the wire. These come in white and paintable versions. Position the cover so it runs parallel to the room's longest wall, which draws the eye along the space rather than across it. If your pendant hangs over a dining table, center the cord run above the table and let it drop straight down, creating a clean vertical line.
Removal and Damage Prevention: Leaving No Trace
The best no-drill installation ends with an apartment that looks exactly as it did before you started. Removal and damage prevention begin at installation: clean surfaces, quality adhesive, and patience with curing time all make the eventual removal easier.
To remove an adhesive hook, use a hairdryer on medium heat for 60 to 90 seconds to soften the adhesive. Gently twist the hook base while pulling downward, never yanking straight off, which risks tearing paint. Any remaining residue rolls off with your fingertip or lifts with a dab of isopropyl alcohol.
Check your ceiling for marks before you consider the job done. Adhesive residue shows up as a slight discoloration or tacky spot. Clean it promptly, since dust and grime settle into sticky residue within days. For cord clips, the same heat-and-peel method works, leaving only tiny marks that wipe away cleanly.
| Removal Step | Technique | Result |
|---|---|---|
| Soften adhesive | Hairdryer, 60-90 seconds | Bond releases easily |
| Remove hook | Twist gently while pulling down | No paint damage |
| Clean residue | Isopropyl alcohol dab | Surface restored |
| Final check | Inspect under raking light | No visible trace |
Conclusion: Your Ceiling, Your Rules
Installing pendant lights without drilling opens up lighting possibilities that renters and cautious homeowners rarely consider. With the right adhesive hook, a clean surface, and a 24-hour curing period, most lightweight pendants hang securely. Heavier fixtures find their answer in tension rods and cable systems, while cord covers keep the result looking polished.
The no-drill approach turns lighting into a flexible design tool rather than a permanent commitment. When your taste changes or you move to a new space, everything comes down cleanly and goes with you.
Nuits designs its pendant lighting collection with these realities in mind. Every fixture ships with clear specifications on weight and cord length, and the 30-day money-back guarantee means you can test a light in your space before fully committing. Browse the Nuits pendant lighting collection to find a piece that matches your aesthetic, then install it this weekend without touching a drill.
Frequently Asked Questions
Can I hang a pendant light without hardwiring?
Yes. Plug-in pendant lights are designed for this exact purpose. They come with a cord and plug that connects to a standard wall outlet, so you skip the electrical work entirely. The main task is supporting the fixture's weight and managing the cord's path from the ceiling to the outlet. This makes them a perfect, damage-free choice for renters or anyone avoiding permanent changes.
Are adhesive ceiling hooks strong enough for pendant lights?
They can be, provided you check the weight rating and the surface. Standard adhesive hooks handle up to 2.25 kg, which suits many small plug-in pendants. For heavier fixtures, look for hooks rated for 4.5 kg or more. Remember that load direction matters: these hooks are strongest when the pull is straight down. Always clean the ceiling with isopropyl alcohol and let it dry before mounting.
How do I hide pendant light cords without drilling?
Use a cord cover kit that sticks to the ceiling and wall, or run the cord along corners with adhesive clips. For a cleaner look, route the cord to a nearby floor lamp outlet or use a swag hook to drape it stylishly down the wall. Choose a cord color that matches your ceiling paint to help it disappear visually.
What is the best renter-friendly lighting solution for a rental property?
A plug-in pendant light hung from a high-quality adhesive hook is the top choice. It requires no drilling, no hard wiring, and no permanent alterations. When you move out, simply remove the light and hook, then use a bit of heat or a gentle adhesive remover to clear any residue. This keeps your deposit safe while letting you personalize the space.

